IRONONLOGO uses eco-solovent ink to print printable PU vinyl to create multi-color or full color iron on transfers, like matte finish iron-on transfers, glossy finish iron-on transfers, reflective finish iron-on transfers for your clothing, either dark colored and light colored fabric. So you can transfer any logo, design, image, photograph on t shirts, caps, jeans, tank tops, pants or more to create your own unique fashion.
There are two methods (Brand SUN IMPRINT logo for example)
With a household iron
Step 1. Get the iron-on transfer (ordered from us), a iron, a handkerchief (or any dry clean cloth) and a t shirt ready;
Step 2. Peel off backing film;
Step 3. Position on t shirts
Step 4. Cover with a handkerchief
Step 5. Set iron "cotton" mode and NO STEAM, move the iron to heat press the iron-on transfer as hard as you can for 2-3 minutes
Step 6: Move away handkerchief and Peel COOL
Step 7: All is done
With a heat press
Step 1. Get the iron-on transfer (ordered from us), a heat press machine and a t shirt ready;
Step 2. Preheat the fabric to remove wrinkles and moisture;
Step 3. Peel off backing film
Step 4. Position on the t shirt
Step 5. Set heat press machine 165°C and 25-30seconds, and heat press
Step 6: Peel COOL
Step 7: All is done
Video:
More videos of various Print/Cut HTV Iron-on Transfer (Same Steps)
Instruction of Matte Opaque Iron-on Transfers on Light Colored Fabric with a Heat Press
Instruction of Matte Opaque Iron-on Transfers on Dark Colored Fabric with a Heat Press
Instruction of MatteTransparentIron-on Transfers on Light-colored Fabric with a Heat Press
Instruction of Reflective Iron-on Transfer on Fabric with a Heat Press
Instruction of Glitter Colorful Iron-on Transfer on Fabric with a Heat Press
Instruction of Flock Colorful Iron-on Transfer on Fabric with a Heat Press
2. How do I apply Cad Cut HTV iron on transfer
Cad cut HTV iron on transfers are made of one finish heat transfer vinyl, such as hologram heat transfer vinyl, glow in the dark heat transfer vinyl, metallic heat transfer vinyl, glitter heat transfer vinyl and more. their finish and quanlity make your clothing outstanding to lead the fashion.
There are two methods to heat apply (SUN IMPRINT LOGO hologram iron on letter for example)
With a household iron
Step 1. Get the iron- on transfer (ordered from us), a iron, a handkerchief (or any dry clean cloth) and a t shirt ready; Step 2. Preheat the fabric to remove wrinkles and moisture; Step 3. Peel off backing paper (no backing paper for PU/reflective iron-on transfer) Step 4. Position on the t shirt and cover with the handkerchief Step 5.Set iron "cotton" mode and NO STEAM, move the iron to heat press the iron-on transfer as hard as you can for 2-3 minutes Step 6: Move away handkerchief and Peel COOL
Step 7: All is done
With a heat press
Step 1. Get the iron-on transfer (ordered from us), a heat press machine, a t shirt ready; Step 2. Preheat the fabric to remove wrinkles and moisture; Step 3. Peel off backing paper (no backing paper for PU/reflective iron-on transfer) Step 4. Position on the t shirt Step 5.Set heat press machine 165°C and 25-30seconds, and heat press Step 6: Peel COOL Step 7: All is done
Video:
More videos for CAD Cut HTV Iron-on Transfer (Same Steps)
Instruction of Reflective Iron-on Transfer on Fabric with a Heat Press
3. How do I heat apply iron-on patch
Iron-on patch can be heat transferred on fabric with a heat press machine or a household iron because there is a glue backing which is melted when heat up so that patch and fabric can stick together.
Iron-on patch is also called sewn-on patch for you can sew it on fabric for permanent attachment to your clothing.
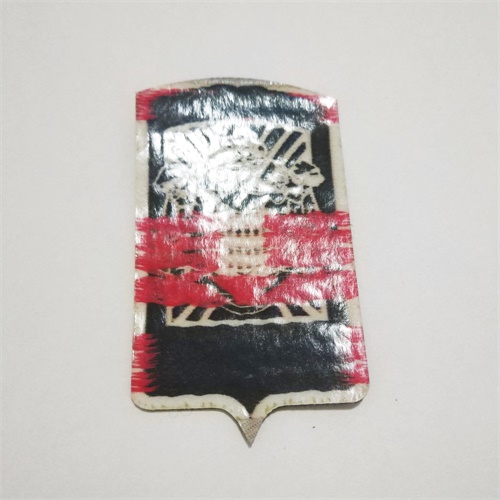
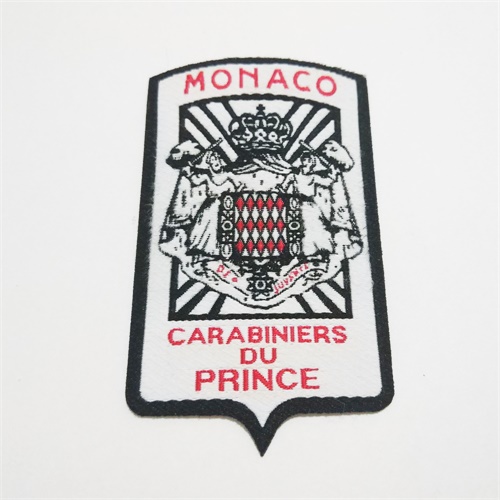
Take a look at one sample of iron-on patch
(image 1: with a glue backing; image 2: with embroidery front)
With a household iron
With a heat press
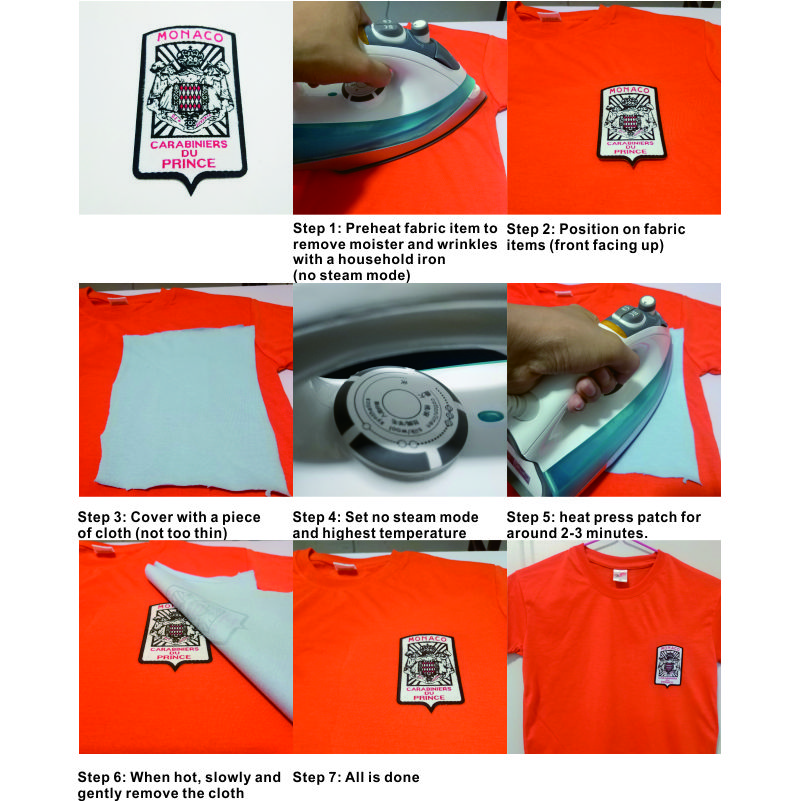
Step 1: Prepare with an iron-on patch, a piece of cloth, a fabric item and a heat press, which is set 165℃ and 25s. Step 2: When the heat press reaches 165℃, place fabric item on it and preheat fabric item for a few seconds to remove wrinkles and moistures. Step 3: Position the iron-on patch on fabric item (image facing up), and cover with a piece of cloth to protect the patch and fabric item from heat. Step 4: Heat press for 25s. Step 5: Move away the plate and cloth. All is done.
4. How do I apply velcro patch?
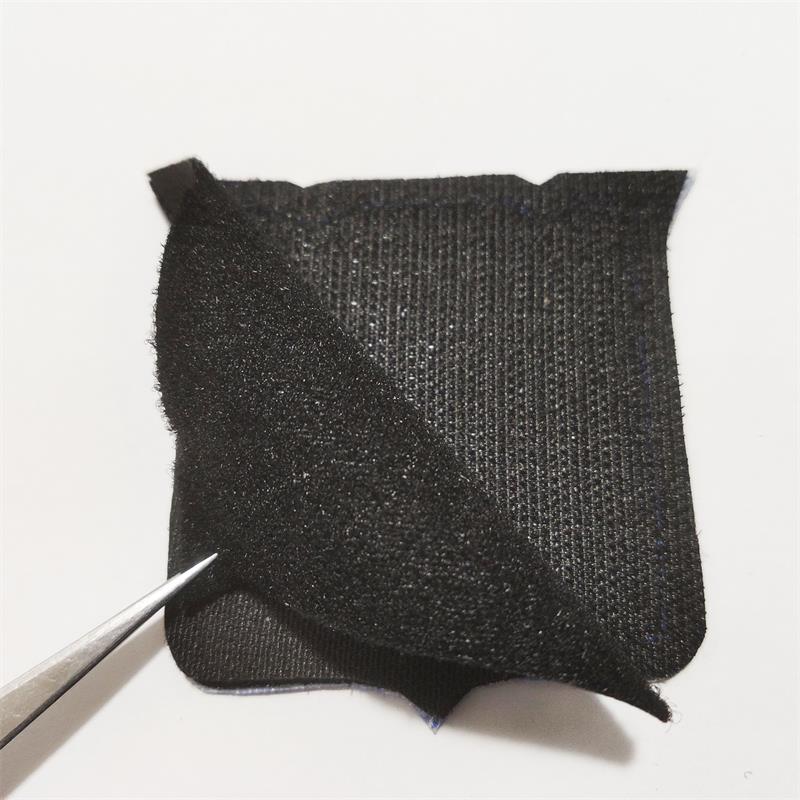
Velcro patch, also called tactical patch or morale patch, with loop and hook backing, allows patch easily attach to something, all you need to do is to peel off its backing and attach to the article you want to decorate.
One sample of velcro patch here:
(image 1: with a loop and hook backing; image 2: with embroidery front)
Just peel off loop part on the back, and attach it to item (with a loop accessory) you want to decorate